TicketHive
TicketHive - Event Ticket Management API
![]()
![]()
![]()
![]()
![]()
![]()
A robust platform for event ticket management with secure authentication, user management, and seamless event operations.
📑 Table of Contents
Features
- Authentication & Security - JWT-based authentication with email verification and refresh tokens
- Event Management - Complete CRUD operations with publishing system and status tracking
- Ticket Management - Advanced ticket operations with filtering, sorting, and pagination
- User Management - Secure registration and profile management
- Payment Integration - VNPay payment gateway integration
- Interactive API Docs - Comprehensive Swagger UI documentation
API Documentation
Swagger UI: http://localhost:5043/swagger/index.html
1. Access Swagger UI
Link: http://localhost:5043/swagger/index.html
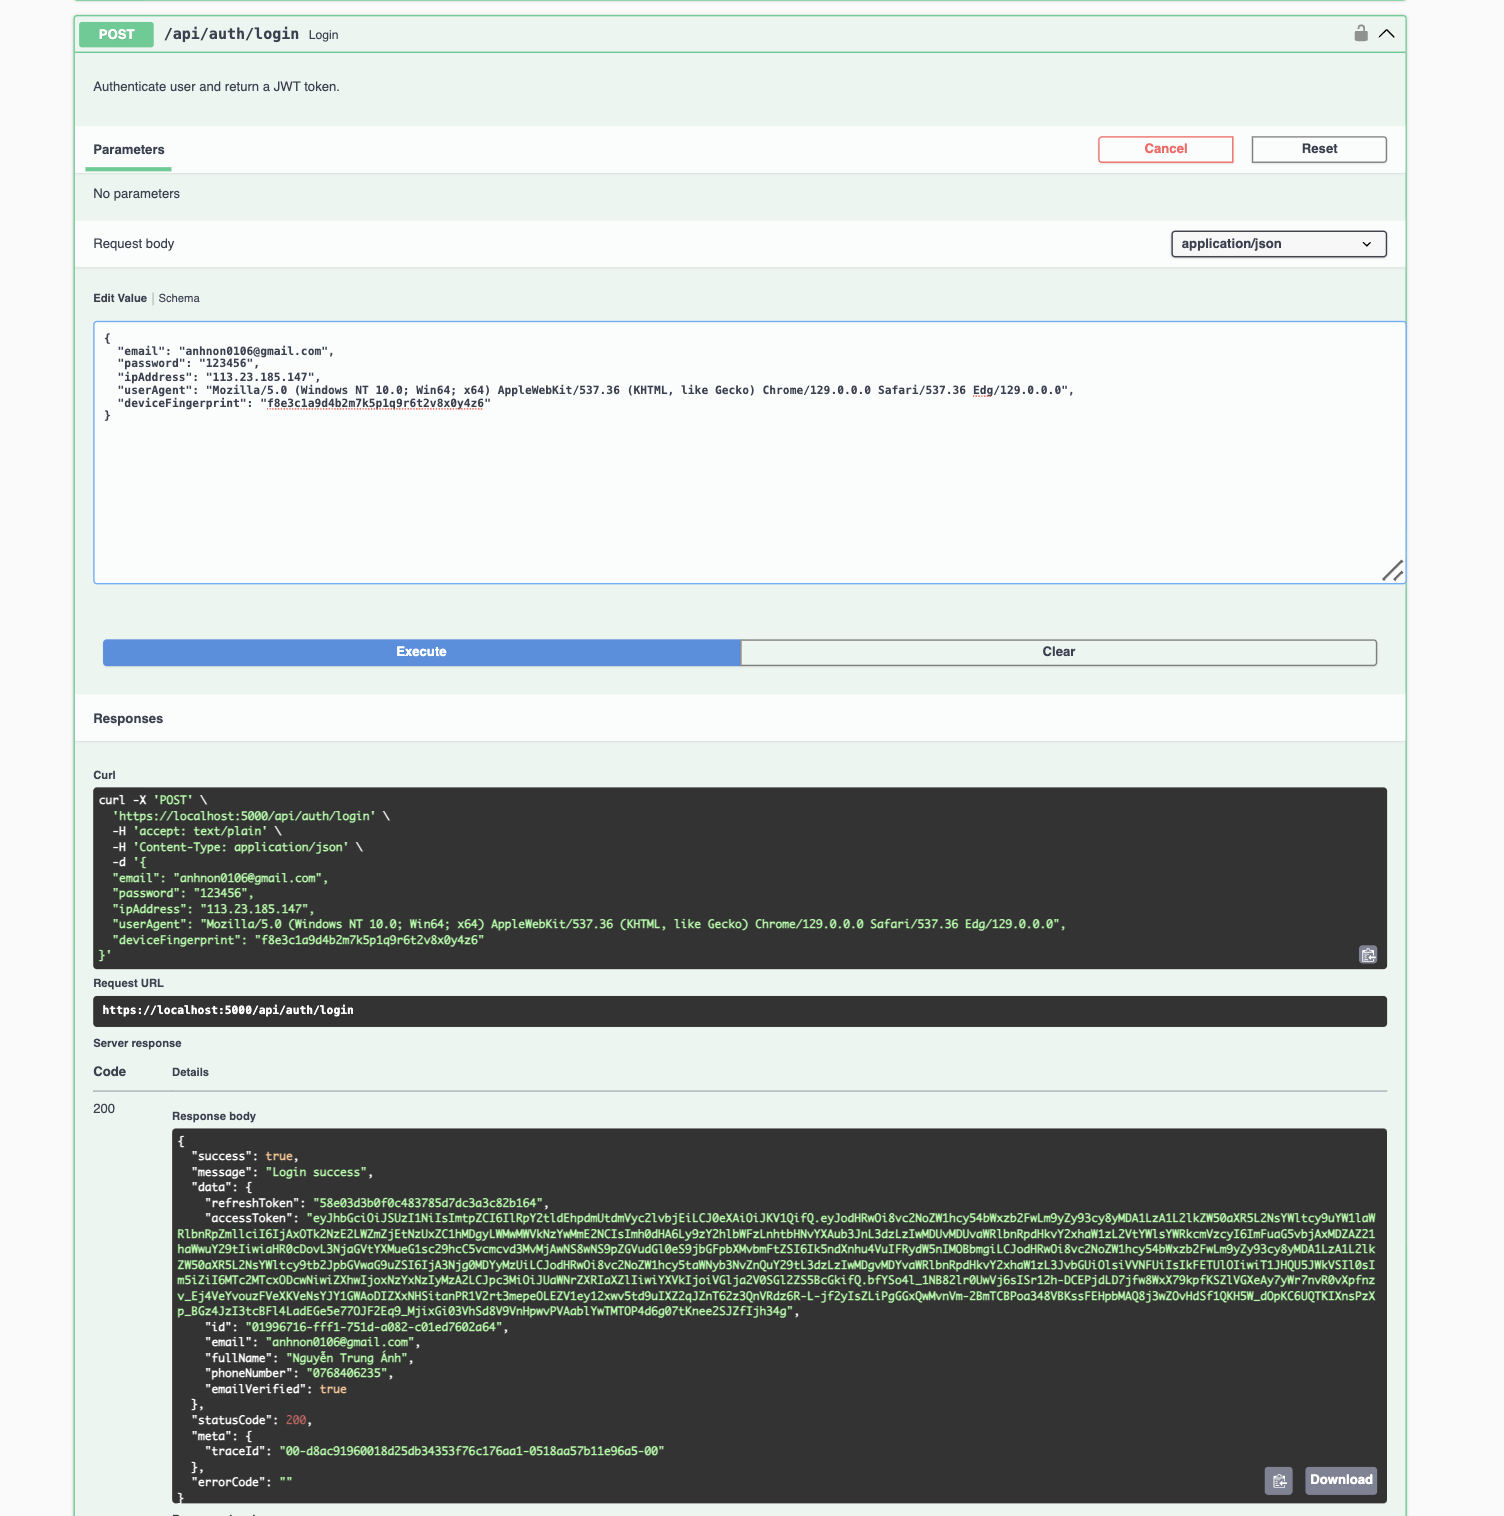
2. Log in to obtain a token
Login interface. Enter username and password → receive JWT token.
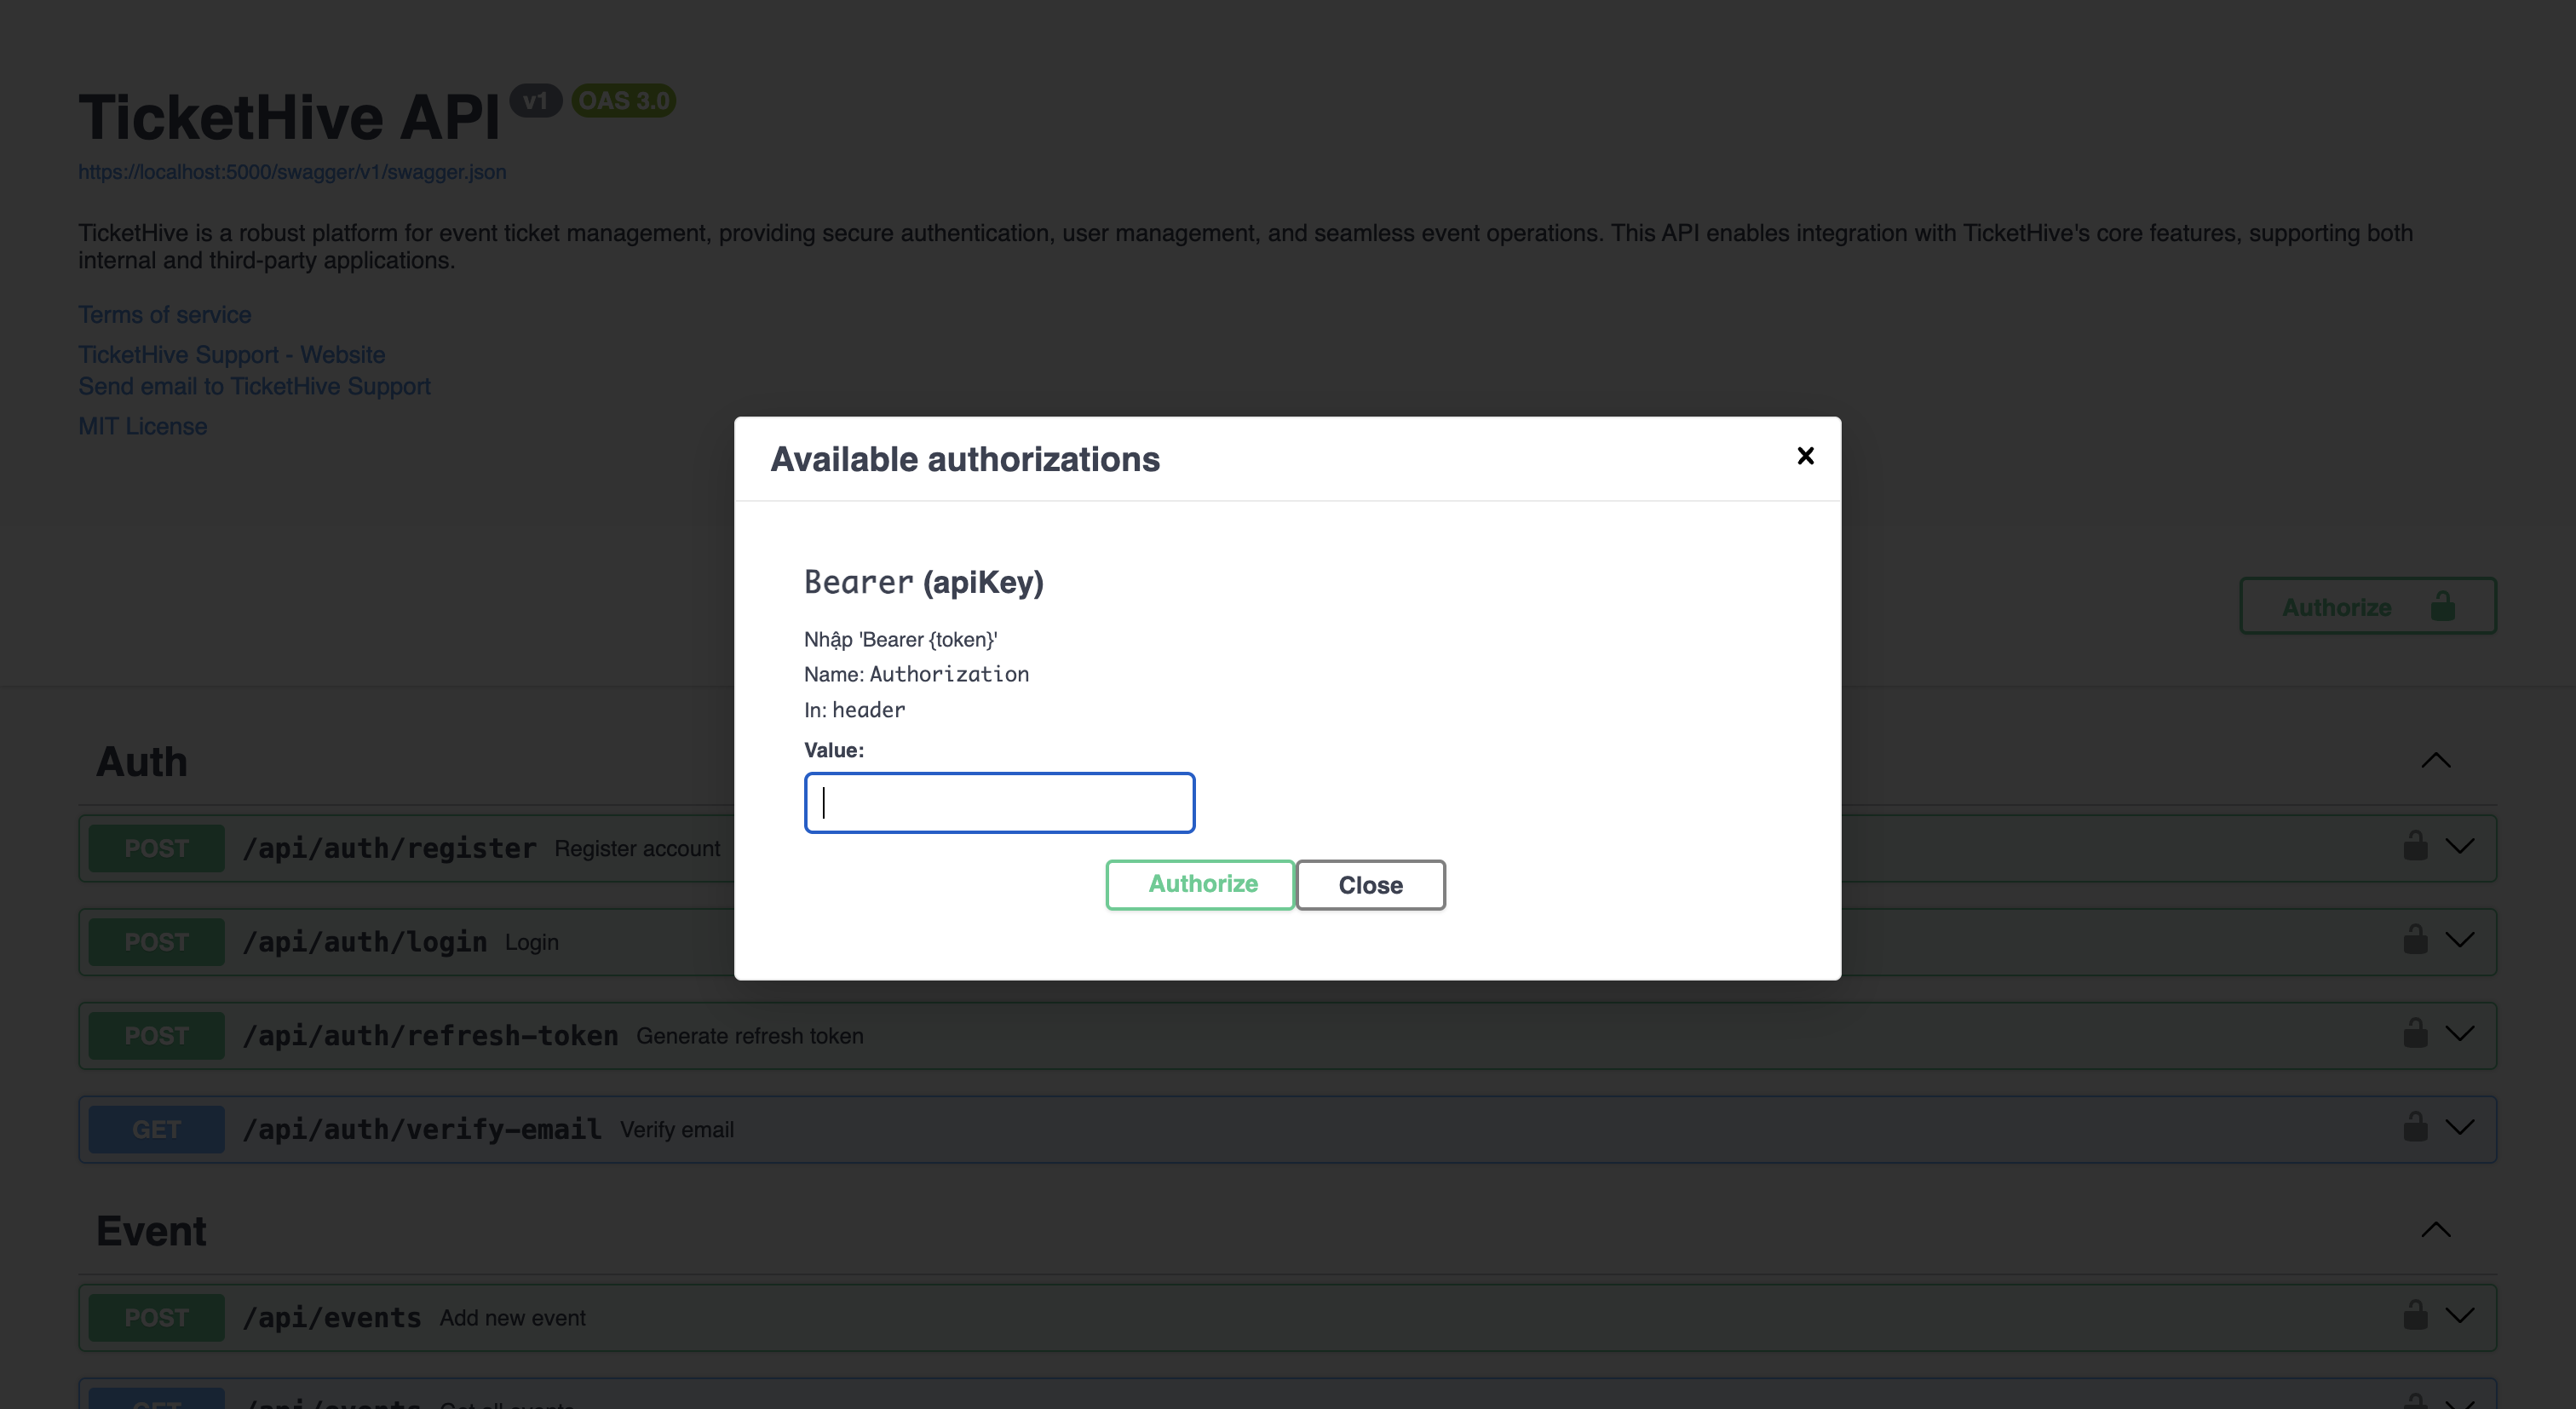
3. Enter the token in Swagger
Click “Authorize” → enter
Bearer <token>→ confirm.
4. Use the APIs
You can now call protected endpoints.
Technology Stack
- .NET 8.0 - Modern, high-performance framework
- Clean Architecture - Maintainable and testable design
- Entity Framework Core - Powerful ORM for database operations
- PostgreSQL - Robust relational database
- JWT Authentication - Secure token-based authentication
- Swagger/OpenAPI - Interactive API documentation
- xUnit - Comprehensive testing framework
- Docker - Containerization support
📁 Project Structure
TicketHive/
├── src/
│   ├── TicketHive.Api/              # Web API layer
│   ├── TicketHive.Application/      # Business logic
│   ├── TicketHive.Domain/           # Domain entities
│   └── TicketHive.Infrastructure/   # Data access
├── tests/
│   └── TicketHive.Tests/            # Unit & integration tests
├── docs/                            # API documentation
└── docker-compose.yml               # Docker configuration
Getting Started
Prerequisites
- .NET 8.0 SDK
- PostgreSQL or SQL Server
- Docker (optional)
Installation
- Clone the repository
git clone https://github.com/hnagnurtme/TicketHive.git cd TicketHive - Restore dependencies
dotnet restore -
Configure database
Update
src/TicketHive.Api/appsettings.json:{ "ConnectionStrings": { "DefaultConnection": "your-connection-string" } } - Apply migrations
dotnet ef database update --project src/TicketHive.Infrastructure - Run the application
dotnet run --project src/TicketHive.ApiThe API will be available at:
- HTTPS:
https://localhost:7043 - HTTP:
http://localhost:5043
- HTTPS:
Using Docker
docker-compose up -d
API Usage
All protected endpoints require a Bearer token:
Authorization: Bearer <your-jwt-token>
Example Request:
curl -X GET "https://localhost:7043/api/events" \
  -H "Authorization: Bearer eyJhbGciOiJIUzI1NiIs..."
Testing
Run all tests:
dotnet test
Generate coverage report:
./Test.sh
Contributing
Contributions are welcome! Please follow these steps:
- Fork the repository
- Create a feature branch:
git checkout -b feature/amazing-feature - Commit your changes:
git commit -m 'Add amazing feature' - Push to the branch:
git push origin feature/amazing-feature - Open a Pull Request
See CONTRIBUTING.md for detailed guidelines.
License
This project is licensed under the MIT License - see the LICENSE file for details.